Credit systems are a powerful way to keep your membership subscribers engaged and excited about your material. Credit systems also provide an incentive for your members to dive deeper and stick around as loyal, paying fans.
Your subscribers can earn credits by completing tasks, consuming course material, or even sharing your site on social media. Once earned, the credits can be exchanged for access to additional content.
What You’ll Need To Add A Credit System To Your WordPress Membership Site
The tool list you need is pretty short:
- A WordPress website
- The AccessAlly Pro membership site plugin
- A tag-based CRM (see the current list of integrations)
How Does A Credit System in a WordPress Membership Site Work?
AccessAlly and your CRM work hand-in-hand to create a flexible credit system for your membership site. Within AccessAlly, you can set up specific credit-earning (or credit-decreasing) functions. For example, you might create a “Gain 10 credits” operation that, when activated, will increase the user’s credit by 10.
The CRM serves as the “bank account”, and keeps track of the overall balance of each user’s credit system.
While it’s an advanced membership site feature, you’ll see that AccessAlly and your CRM do all the heavy lifting.
How To Add a Credit System To Your WordPress Membership Site
In this example, I’ll show you how to use AccessAlly to control your automatic redirection.
Step 1: Install the AccessAlly plugin on your WordPress Site & Set Up Integrations
AccessAlly can be installed on your WordPress site like any other plugin. Then, integrate it with your tag-based CRM of choice.
Step 2: Create A Custom Field Inside Your CRM
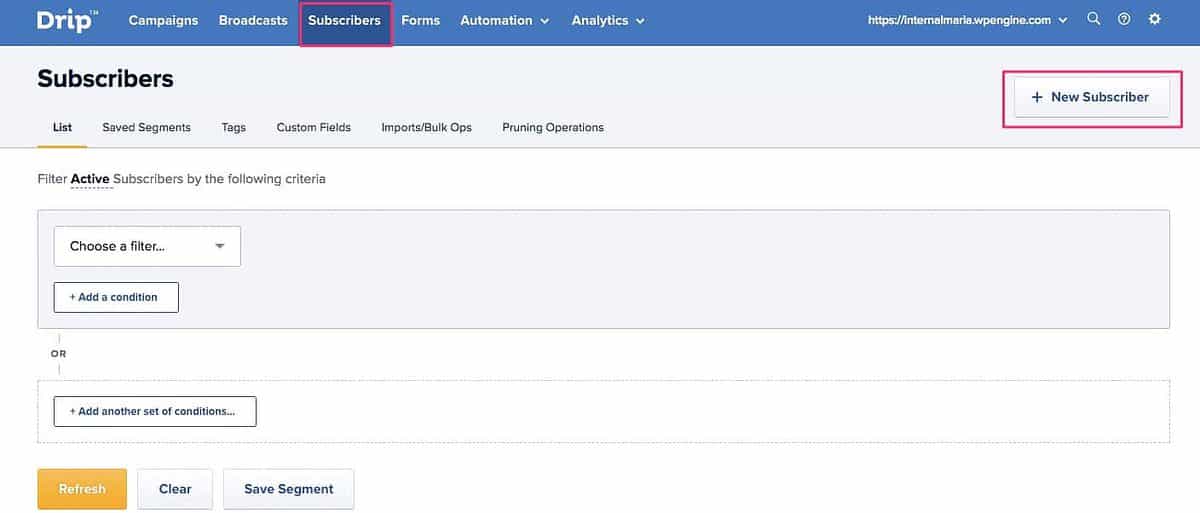
Inside Drip, go to Subscribers > + New Subscriber.
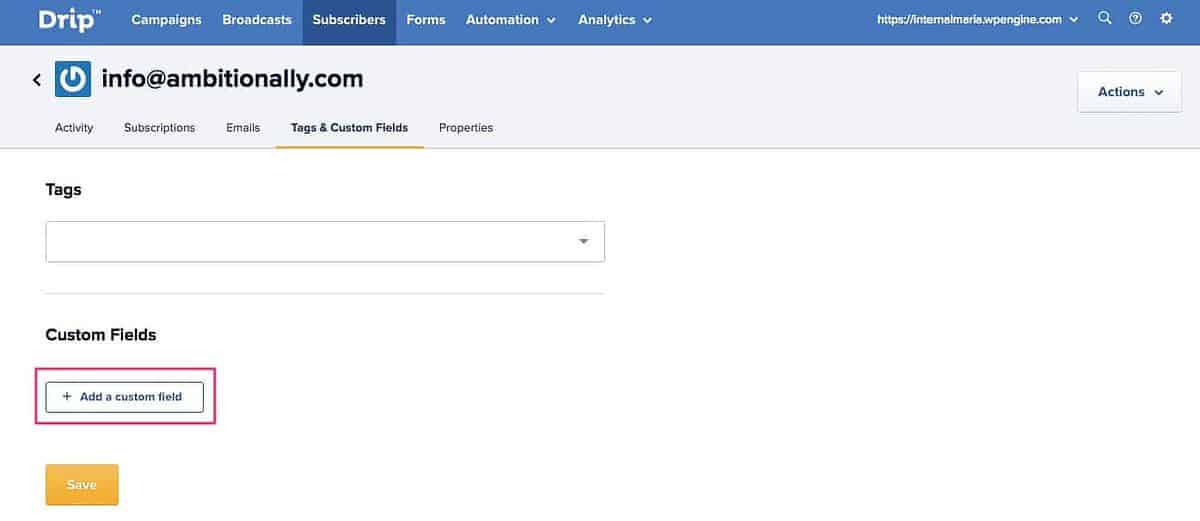
Add a new custom field.
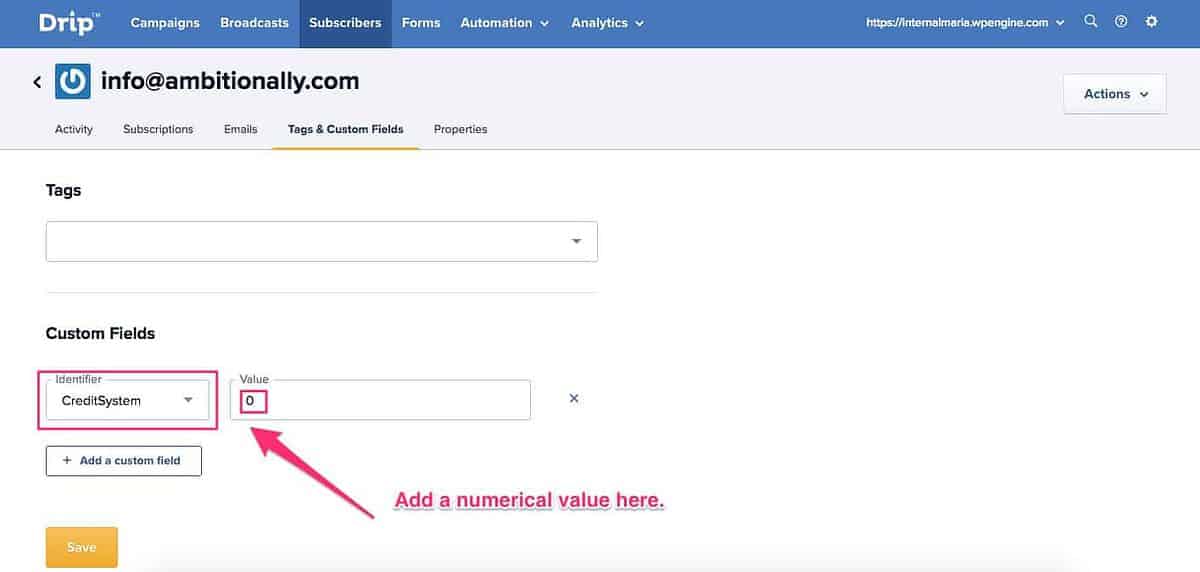
Label your custom field something obvious (like “credit system”), and give the Value field a numeric value (zero is a good place to start!).
Step 3: Set Up Your Custom (Credit) Operation In AccessAlly
Inside your WordPress membership site, go to AccessAlly > Custom Operations.
Then, click on Add New.
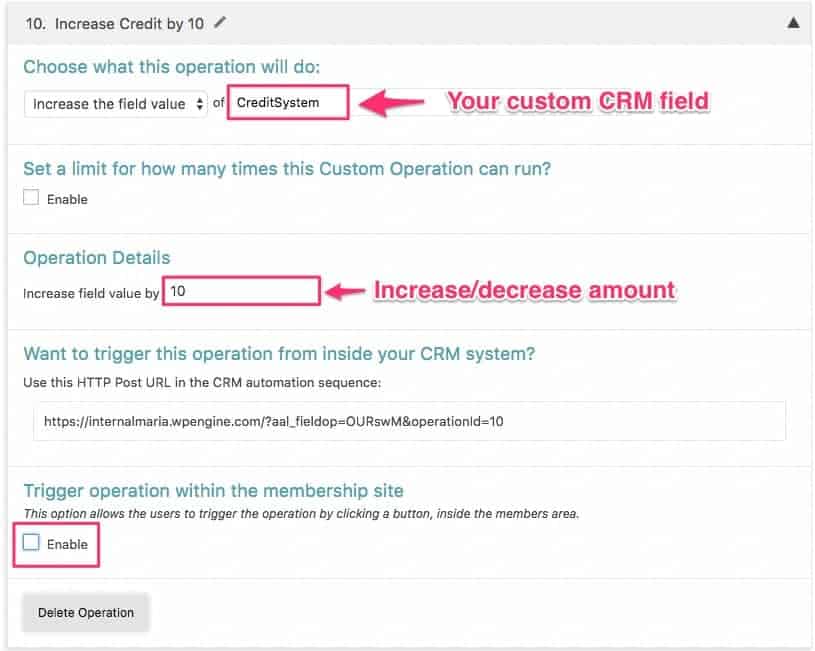
Here, you can set up the basic parameters of your credit system operation.
The settings in the screenshot below include:
- Telling AccessAlly that you want to increase the number inside the custom field value you configured in Step 2.
- Set a limit for how many times this action can be completed (left blank in the example, but useful for limited promotions.)
- How much you want to add to the credit system “bank” when this “transaction” takes place.
- The HTTP post handshake, which can be used if you want to trigger a credit increase from a CRM automation process.
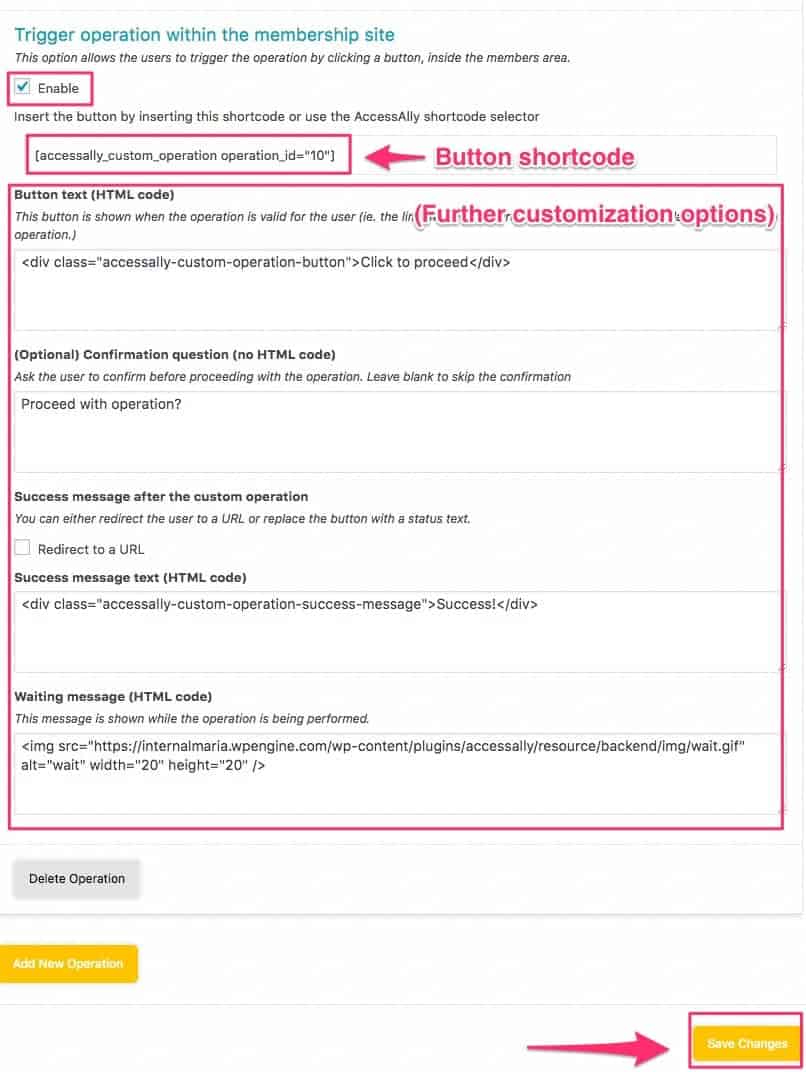
- An option to allow this increase to be triggered from within the membership site itself. (For this example, we’ll click “Enable.”)
Checking the box by “enable” reveals an additional set of options. The most important here is the button shortcode. Copy this shortcode to add to a page in the next step.
Step 4: Add The Credit Increase Shortcode To A WordPress Page
Now, it’s time to see it all work!
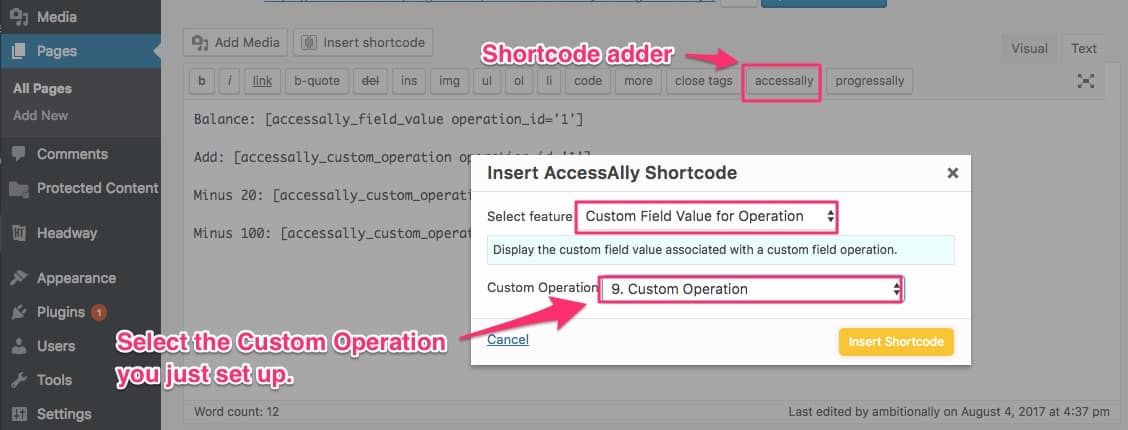
On the post or page that you’d like to use this increase on, simply add the shortcode from Step 3 to the page content. (The shortcode can also be found through AccessAlly’s shortcode adder, located on the toolbar.)
If you want to show the overall credit amount for each user, you can add the “Custom Field Value For Operation” shortcode.
When both are on the page, it will look similar to this:
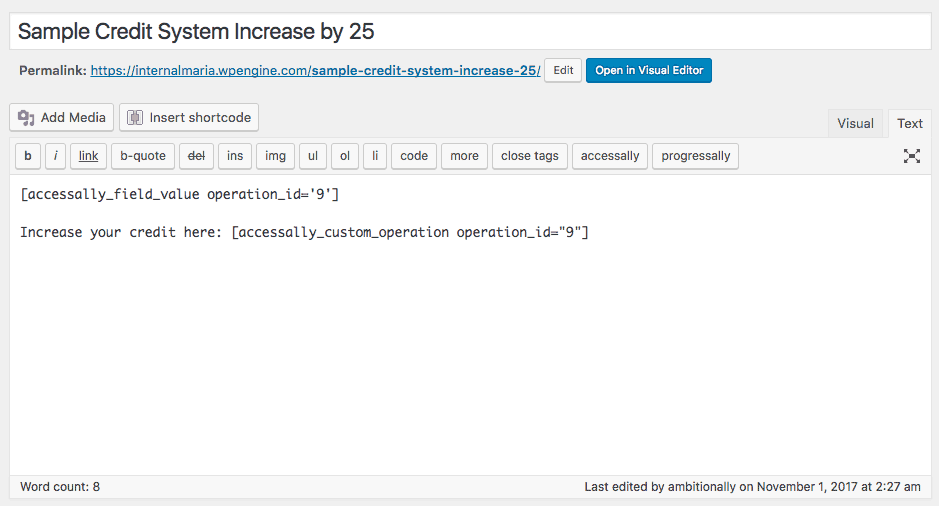
On the frontend, it will look something like this:

Each time the button is clicked, the credit should be increased by the amount you designated inside AccessAlly.
Step 5: Test with a registered Membership Site User
When testing to see if your Credit System works properly, make sure you’re logged into the site, using a test user who exists both in your membership site built with AccessAlly and has a corresponding subscriber inside your CRM software.
Anyone who is not logged in will be unable to use the credit system, since AccessAlly will have no way of identifying which “bank” to add the credit to.


