As a membership site owner or online course creator, it’s inevitable, you’re going to receive refund and cancellation requests from your members – it’s just a part of doing business.
Having a process and win-back strategy in place to field these inquiries will help make the cancellation request seamless for both you and the end recipient.
When you automate the process with AccessAlly, there’s a good chance you may even win back the member with an enticing offer before they finalize their cancellation. Here’s how you can reduce membership cancellations with a win-back campaign strategy.
Note: This strategy is for ongoing, recurring subscriptions for your courses and memberships.
Mapping Out Your Win-Back Campaign Offers
To get started, brainstorm a list of offers that would benefit your members and entice them to keep their membership active. This should be a no-brainer decision for them.
You can use the reasons that people mentioned for canceling in the past and come up with solutions to these. Say if someone says they don’t have time to go through all of your content each month, you could give them the option to do an “Abridged/Cliffs Notes” version (maybe at a higher or lower price point, depending on what you’re offering).
Here are a few more ideas to consider as a “win back offer” before they cancel:
- Switching to a different tier of your membership
- If you only have only one tier, a discount on their monthly membership cost moving forward
- A free month
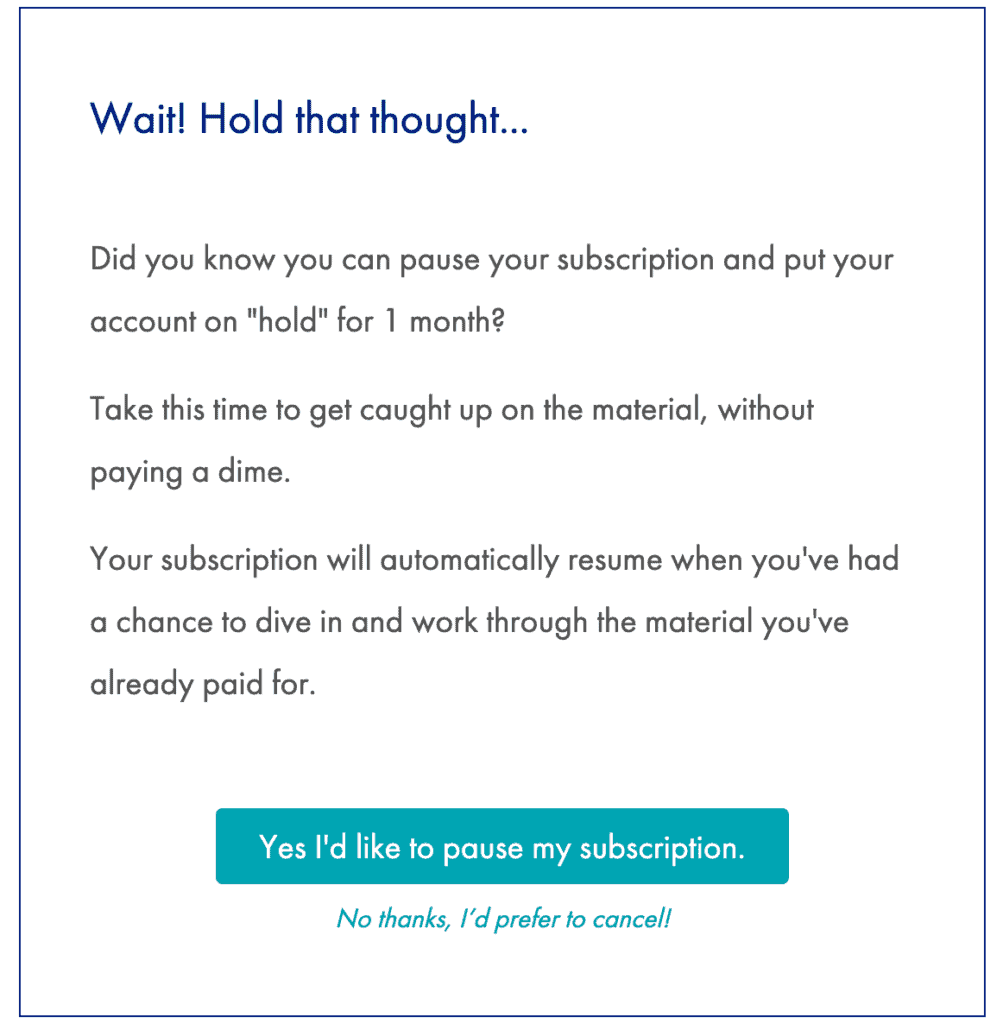
- The option to put their subscription on hold for a specified period of time
- Bonus course(s) that aren’t included in the regular membership
- A call with you or a member of your team to work through their roadblocks
- If you use a credit system, you could give people additional points for keeping their membership active
Let’s take a look at how you can configure a win-back offer using the self-cancellation functionality in AccessAlly Pro.
Complete Your Self Cancellation & Win-Back Setup in AccessAlly Pro
Step 1: Create a Self-Cancellation Survey
Set up a “personality style” quiz inside AccessAlly Pro using ProgressAlly to redirect members to when they click the button inside your member’s area to cancel their subscription. (You can link to this quiz page from anywhere inside your membership site, for example, on a “My Account” page.)
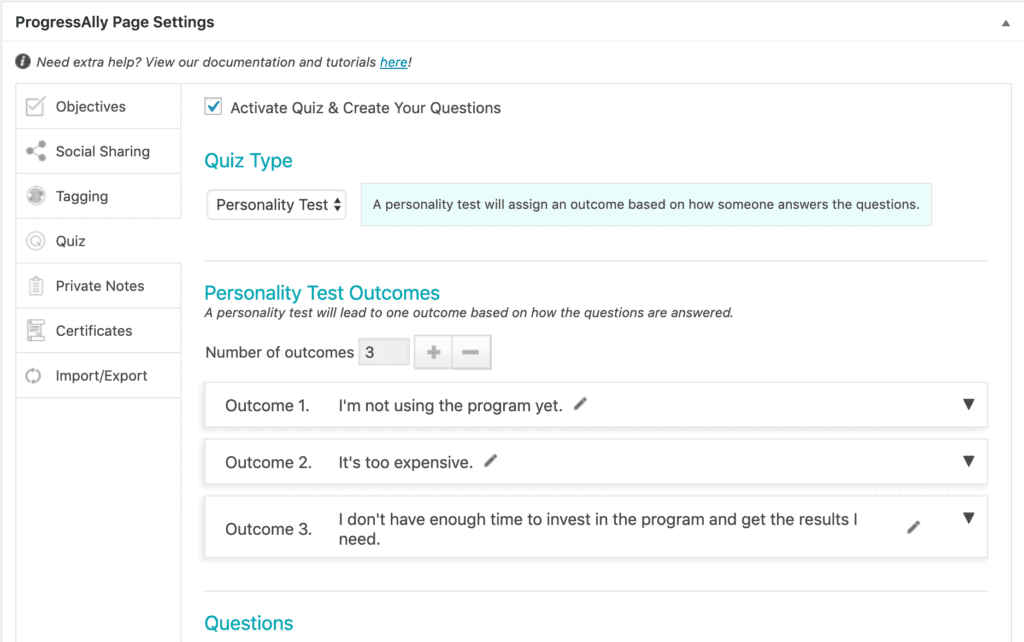

You’ll want to use this quiz functionality so you can use this as an opportunity to gather more information about why members are canceling their subscriptions. The reasons for canceling will be the quiz responses.
Pro Tip: Keep this quiz short and sweet to prevent any frustration the member may have with processing their cancellation.
We recommend limiting it to a single question, “Why are you canceling today?”, or “Why is this membership no longer a good fit for you?”.
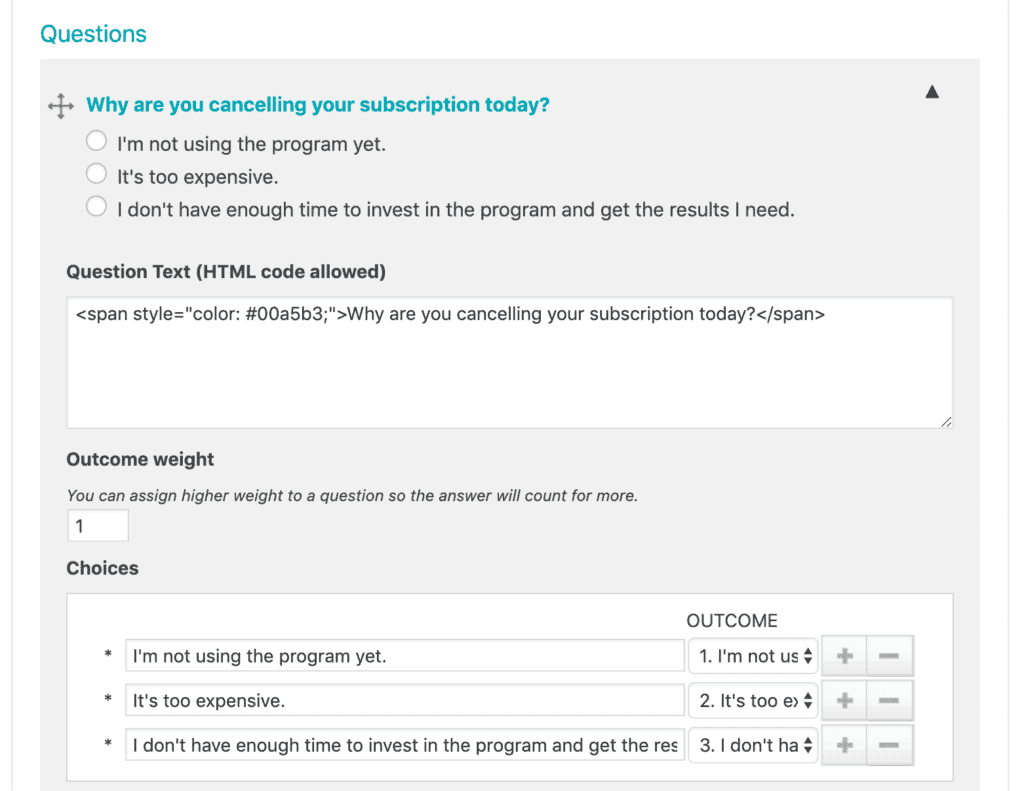

Step 2: Draft Custom Responses for Each Cancellation Reason.
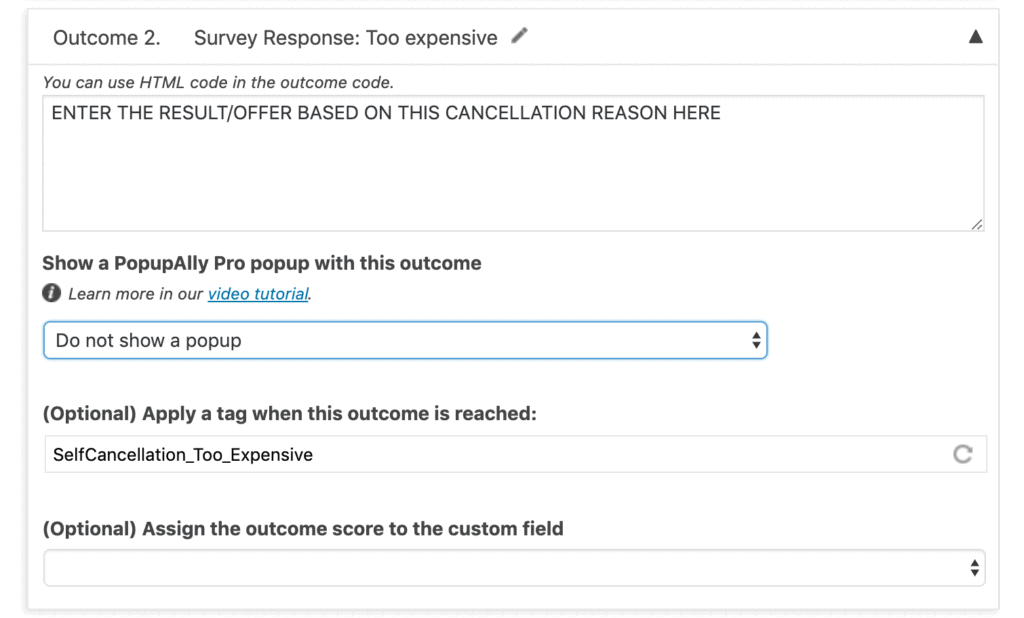
You’ll want to create a customized response tailored to the member’s chosen cancellation reason with an offer that addresses their pain point. For example, if a member says they are canceling because the membership cost is too expensive, you could retain this member by offering a discounted rate going forward or for a specified period of time.
You’ll add these responses to your quiz setup here.

Step 3: Track Reasons for Cancelation
You’ll want to apply a tag to each member based on their response so you can gather data for your records and adjust your win-back campaign strategy based on your customer’s needs.
You can monitor the top reasons for cancellation and use this data to improve that aspect of your membership and reduce future cancellation requests using the “(Optional) Apply a tag when this outcome is reached” section above.
The tag is applied when the response is chosen, upon clicking the “Proceed to cancel” button, shown here.
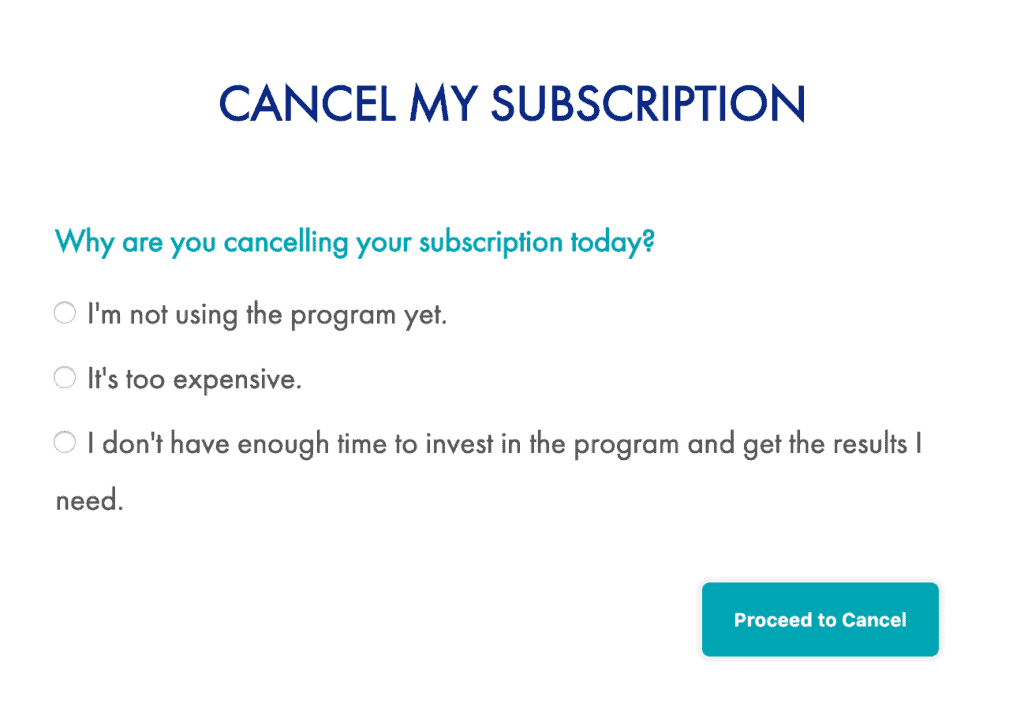

You can get as creative as you’d like with your responses. This is where you will present an offer to entice them to stay and abandon the cancellation.

Step 4: Always Offer a “Proceed to Cancellation” Button.
Including a “proceed to cancellation” button or link within each automated response based on their reason for cancellation gives the individual an option to decline the offer and proceed with their cancellation as originally intended if they don’t want to take you up on your win-back offer.
Follow this tutorial to create a new custom operation for canceling a subscription, then add it to a new page that explains that they’re about to cancel their subscription and they will lose access.
Step 5: Create Buttons to Accept or Decline Each Win-Back Offer.
Use AccessAlly’s custom operations to create the buttons you’ll add to each response area in your personality quiz so that the member can click and accept your win-back offer immediately.
Whether it’s releasing a bonus course, adding credits to pause their subscription, or giving them a specified number of months for free, follow this tutorial to create each one.
If you’re offering a discount, you’ll want to create a subscription replacement to switch their subscription to another subscription at a lower price. Here’s the tutorial to walk you through this setup. Follow the steps for Option #1
Step 6: Publish and Test your Win-Back Campaign.
Make sure that each branch of the quiz works as expected, and that your “proceed to cancellation” links are all working too.


