If you’re reading this, you may be thinking about launching your first online course as a way to scale your business or make passive income alongside your other commitments, such as client work, a full-time job, or motherhood.
Or, you’re an existing course creator looking for practical ways to make your courses even more profitable. Either way, if you want to see success with your online courses, there are several things you must get right.
In this article, we’ll go over the practical steps to launch a profitable online course.
Set the Right Price for Your Online Course
⚠️ Pricing your online course shouldn’t be an afterthought. It’s important to get it right from the start because a bad pricing strategy can ruin your launch. This includes both the price tag of your course but also your pricing model.
1. Set the Right Price for Your Course
What to Consider when setting your course price?
Price your course too low, and it’ll be perceived as not valuable enough. Price your course too high, and your target audience might be unable to afford it. So, how do you find the right price for your course? There are a few factors to consider, such as:
- Course type & content,
- Your revenue goals,
- Your audience size,
- Competitor pricing,
- Costs of course creation.
Course type & content
One pricing misconception many course creators have is that their course price should be based on its length. That’s not true.
📌 The cost of your course should reflect the value of its content. Length will become an inherent part of it because the more in-depth your course content is, the longer it’ll get.
With that said, your course type will also play a role. A mini-course with ten 15-minute videos will cost much less than a long flagship course with 27 hours of content.
Your revenue goals
Your revenue goals will affect both the price tag of your course and your pricing strategy. To find the pricing sweet spot, consider how much money you want to make, the size of your audience, and the expected conversion rate.
Your audience size
If you don’t know your audience, you’ll struggle to find the right price point for your course. Before you set the price, figure out who you’re targeting and how much they’ll be willing to pay.
Competitor pricing
If your course exceeds your competitor’s pricing, potential students will likely buy from them. If your course price falls far below the market average, you risk having your course be perceived as low-value. So, before committing to a price, research how much your competitors are charging.
Costs of course creation
When setting your course price tag, you must factor in course creation and launch costs. This is anything from the filming equipment and the cost of the online course platform or plugin to host your course to your marketing budget.
2. Pick a Pricing Model
Choosing your pricing strategy is critical to a successful course launch. Here are three main pricing models you can choose from.
Free courses
If you aren’t looking to make a profit from your course, you can give it away for free. This is a great way to test the waters and gain student feedback before improving the course and making it paid.
Subscription-based courses
If you want to make a regular recurring weekly, monthly, or annual income from your course, go for a subscription model. In this case, you can create a membership-based course where you drip-feed new content every week or month.
Premium courses
Premium courses are sold at a higher price because they provide in-depth knowledge. The more valuable the content of the course, the higher the price you can set.

Market Your Online Course
Once you’ve created your course, it’s time to market it. You can do that in a few steps:
- Build a sales page for your course,
- Promote it on social media and leverage your network,
- Set up an email sequence to market it to subscribers,
- Add CTAs to your website to sell it to organic visitors.
Below, we share practical tips on how to succeed with each step.
Build a Sales Page
A sales page is to your online course like a window display is to a retail shop. It’s where you’ll share everything your potential students need to know about your course, from what it’s about to what each module contains and why it’s right for them.
Here’s how to build an effective sales page for your online course.
Creating your page
Depending on your business model, there are different types of sales pages you can create to market your online course. You can opt for a click-through sales page that aims to get your potential students to click the “buy now” button or go through a sales funnel.
If you choose to go through a sales funnel, you’ll need to build two additional elements aside from the sales page:
- A lead-generation page. You can have different types of lead-generation pages:
- An opt-in form page where people sign up for the course waitlist and get funneled into an email marketing sequence.
- A video sales letter page where people need to leave their email addresses to watch a video about the course and then get funneled to the main sales page, which does the job of selling the course.
- An email marketing sequence that aims to either prime potential students for the course launch or lead directly to a sale (by sending them to the main sales page).
We’ll cover how to build an effective click-through sales page below.
Tips for creating a successful sales page
✅ The success of your sales page depends on two things: its copy and design. Bad copy will confuse potential students, and bad design will make them click away.
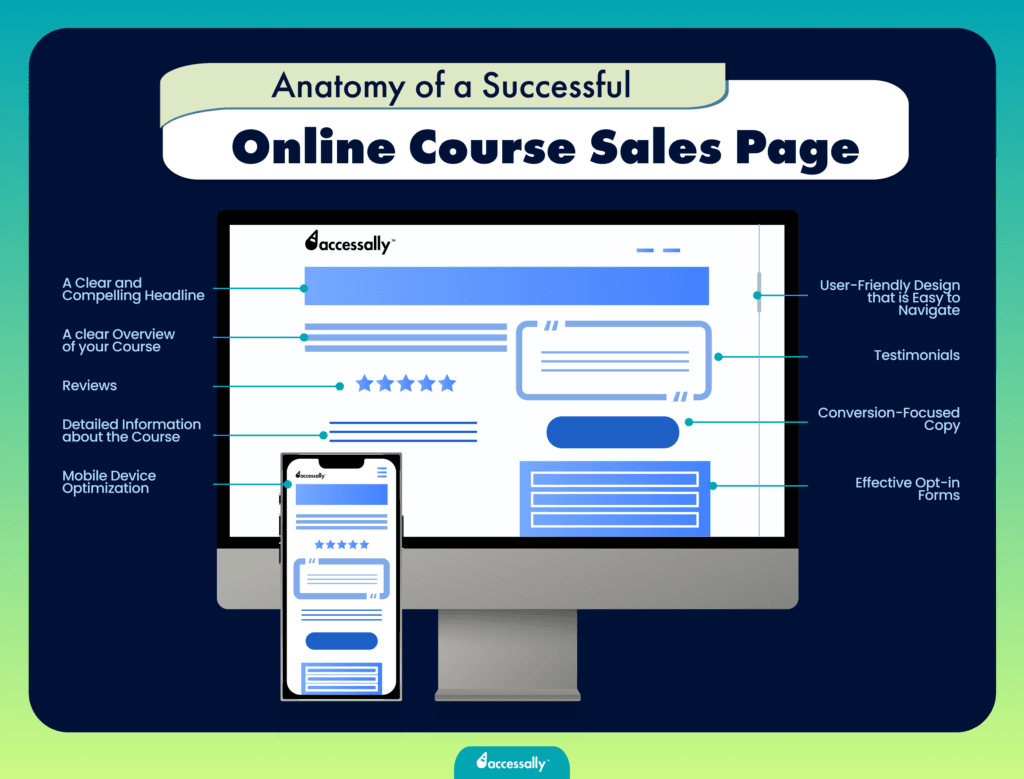
Your sales page copy should clearly convey what makes your course unique, why it’s right for your target audience, and why they should buy it. An effective course sales page copy should have the following elements:
- A compelling headline: The headline should tell potential students what the course is about and what results they can get right off the bat.
- A clear overview of the course: Your sales page should highlight who the course is for and what problem it solves (or what skill it teaches) to filter out those who aren’t the right fit.
- Detailed information about the course: In this section, give a detailed description of each module and outline what participants will learn from it, list what they’ll get, and mention any bonuses or add-ons you’re providing (like PDF worksheets and quizzes).
- Social proof: Show off the results you’ve achieved for others. Put reviews and testimonials from past students or clients on your sales page. Add logos from companies you’ve worked with, certifications, or any proof of your expertise.
- FAQs: Your sale page should answer any questions your students have about the course that may prevent them from buying. Including FAQs is a great way to overcome these objections.
In terms of design, you must make sure that your sales page:
- Is easy to navigate. Your page should be both visually appealing and user-friendly. Use clear headings, a logical layout, and easy-to-find navigation links.
- Loads fast. Research by Google says that 53% of website visitors will abandon a page if it doesn’t load in under 3 seconds.
- Is optimized for mobile devices. 76% of consumers shop on their smartphones. If your page isn’t optimized for mobile devices, you risk missing out on potential students.
- Has clear CTAs. Too many different CTAs can confuse students and deter them from buying the course. Instead, focus on one clear CTA and place it in multiple strategic places on your page.
- Has clear opt-in forms. If you want people to join a waitlist, put a short opt-in form at the end of your sales page. You can guide them to this form using CTAs placed throughout the site.

Examples of a successful sales page built with AccessAlly
Nurture to Convert
The Nurture to Convert Accelerator is a group coaching program for boss moms that teaches them how to run their business in a way that’s aligned with them.


Why is this sales page successful?
It highlights who the program is for, what problem it solves for them, and the results they can expect. Plus, the copy of the page clearly shows that its author understands exactly what her audience wants and needs.
Kim Garst
Kim Garst is a business coach, mentor, and best-selling author who helps entrepreneurs build profitable businesses online.
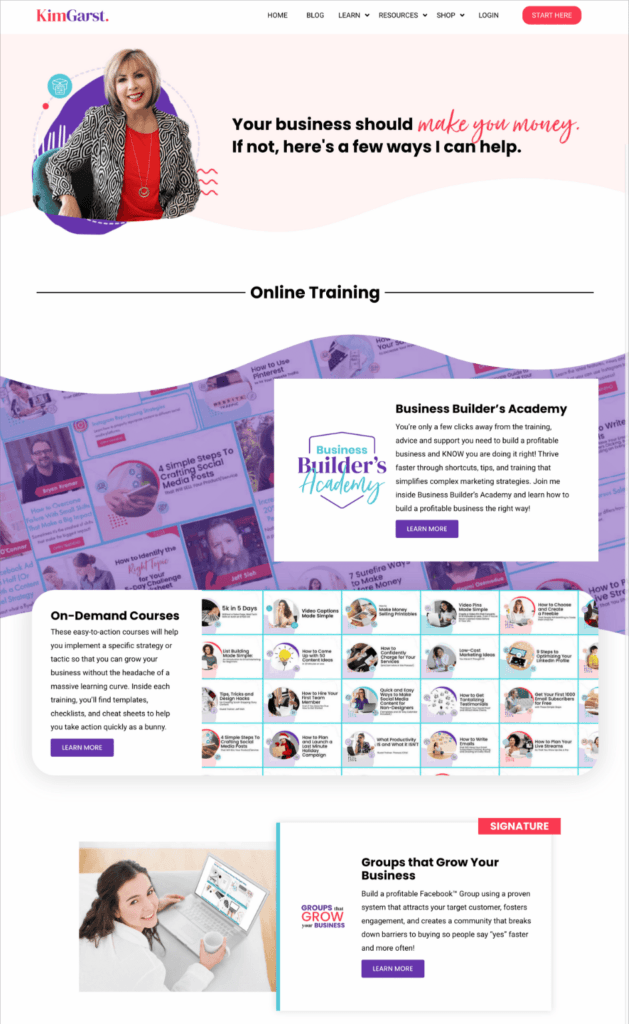

Why is this sales page successful?
It addresses one problem Kim’s target clients have: they’re struggling to make money with their online business. The page outlines different ways they can work with Kim, with a clear layout that’s easy to follow.
Dance Nutrition
Dance Nutrition was created by a former dancer turned Registered Dietician Nutritionist on a mission to help dancers find the right meal plan to fuel their performance.
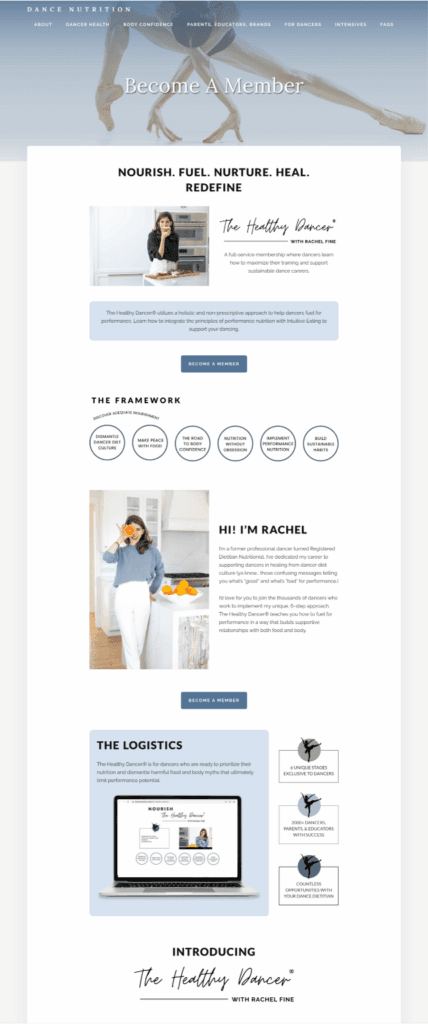

Why is this sales page successful?
The page targets a niche audience (dancers) with a specific problem: finding the right nutrition plan to support their dancing careers. It speaks clearly to dancers and outlines the benefits of the program in an easy-to-navigate, straightforward layout.
Promote Your Course to Your Network
Unless you’re hosting your course on a marketplace like Udemy, you’ll have to market your course on your own. There are many to do that, such as using paid ads or promoting it organically on social media. If you have the budget for ads, do both.
If you’ve already built a solid social media following, you can leverage it to sell your course. Use Instagram stories and TikTok videos to talk about your course, post about it on your Facebook and Instagram feeds, or promote it during a live Q&A.
Leverage Your Website’s Organic Traffic
If you already have a well-established website that receives a high amount of organic traffic from Google every month, you can leverage it to market your course to more people by using SEO practices on your sales page. Optimize your online course sales page for the right keywords to make it discoverable in Google’s search results.
Aside from that, you can leverage your existing website traffic. Since your main website is already getting discovered by people interested in what you do, mention your course and add CTAs to the course sales page throughout the site.
Use Email Marketing
An email list is a massive opportunity to drive more online course sales. You can promote your course to your subscribers with strategic email campaigns. The most powerful way to do that is to create an email sequence to lead up to your course launch, creating anticipation and addressing potential questions.
There are many effective email marketing strategies you can use to promote your course to your email list, such as:
- Offering discount codes and coupons,
- Sharing other students’ success stories,
- Using storytelling to grab attention,
- Giving access to a free lesson from the course,
- Asking subscribers to email you back with questions about the course.

Real-Life Companies Who Created Profitable Online Courses With AccessAlly
The Chestnut School of Herbal Medicine


After 2.5 years of using LearnDash, The Chestnut School of Herbal Medicine switched to AccessAlly because using LearnDash made their course site clunky with too many add-ons. With AccessAlly, they provide better student navigation, allow for uploading assignments (instead of emailing in their projects), and improve the overall student experience.
Graphic Change
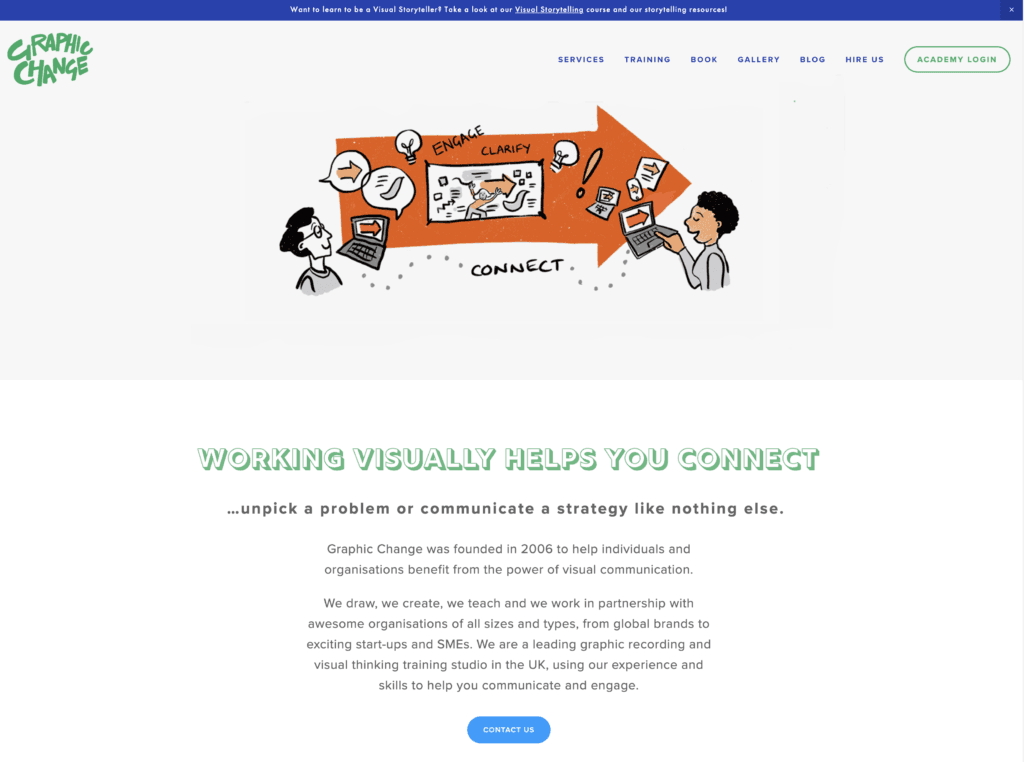

AccessAlly helped Graphic Change switch from in-person offerings to online courses after the pandemic.
Graphic Change started using AccessAlly in 2018 to complement their in-person training business with online courses. This allowed them to smoothly transition to offering solely online courses when providing in-person services during the pandemic became impossible.
Overall, AccessAlly made it possible for Graphic Change to pivot their business model into online courses and scale their revenue.
Becca Tracey


For the past 3 years, Becca Tracey has been running her signature online coaching program, Uncage Your Business, using Dropbox. But seeing how her course launches grew each year, she decided it was time to switch to a platform that would let her host the course on her website, use her branding, and give her students a better learning experience.
She was able to achieve all this with AccessAlly and experienced a big course launch, which brought over $100,000 USD in sales.


