One of the most important things course creators must decide on is what platform to host their courses on. This choice can be confusing, given that most articles on this topic throw different types of online course platforms under one umbrella term – LMS (Learning Management System) – and focus solely on their features rather than their intended use.
✅ However, not all online course tools are the same and can be classified as LMS. In fact, there are four types of online course platforms you can choose from: pure LMS, standalone online course platforms, LMS plugins, and course marketplaces.
Each one of these platforms targets course creators at different stages of growth and with different needs, so to choose the right one for you, you need to understand the differences between them.
In this article, we’ll bring clarity around the different types of platforms available to course creators and list the 10 best online course platforms to create, host, and sell your courses in 2024.
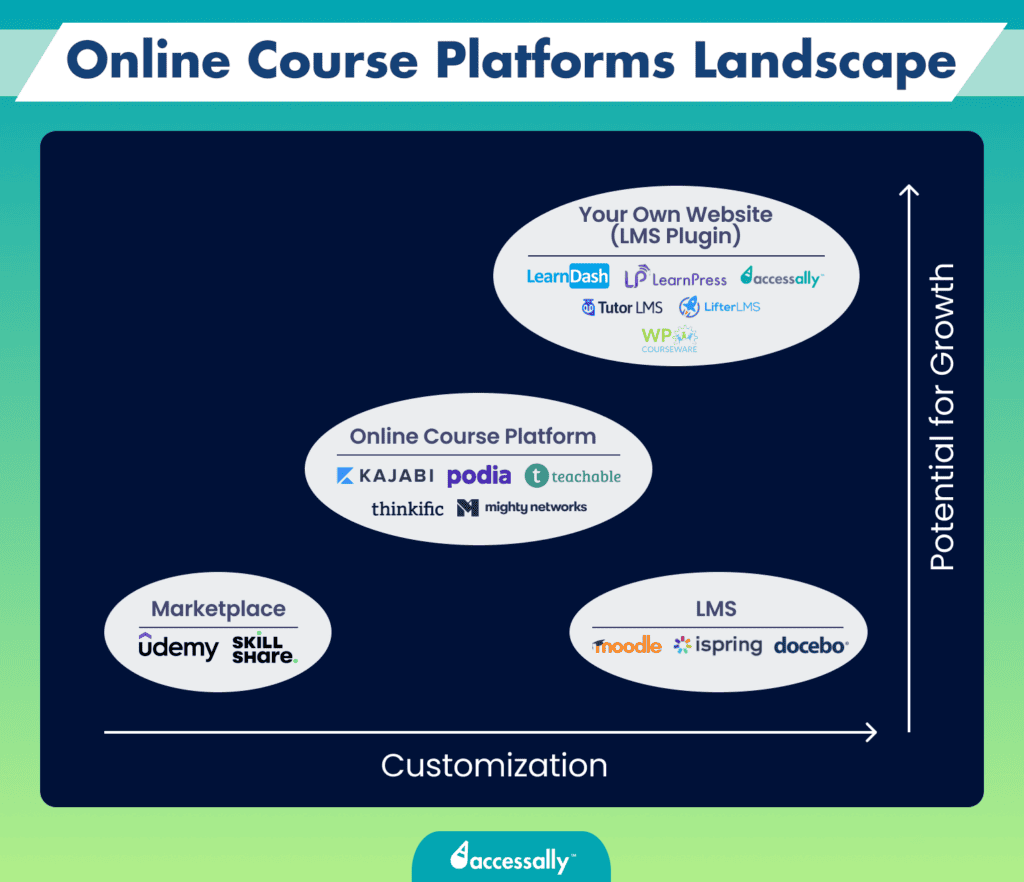
The illustration below shows the 4 types of online course platforms based on the level of customization and potential for growth.

The Best Online Course Platforms (Quick Links)
No time to read through the entire article? No worries. Here’s a quick summary of the 10 online course platforms and tools we’ve reviewed.
Self-Hosted
For Creators Who Want to Host Courses on Their Own Website
Standalone Platforms
For Course Creators With an Established Audience
Marketplaces
For New Course Creators With Small Budgets
Which Tool Do I Need?
Online Course Platform vs. LMS Plugin vs. Marketplaces vs. LMS
When choosing the platform for your online course, you’re faced with countless options, all of which target course creators at different stages of business and with different goals. To find the platform that best aligns with your needs, you must first understand the key differences between all options available to course creators.
📌 While it’s common for people to think that all online course platforms fall under the term LMS, this isn’t accurate. “LMS” stands for Learning Management System, and it’s just one kind of online course solution.
There are actually four types of tools that people sometimes group under the LMS umbrella:
- Online course platforms (like Kajabi and Podia),
- Course marketplaces (like Udemy and Skillshare),
- LMS WordPress plugins (like AccessAlly and LearnDash),
- LMS platforms (like Moodle and Docebo).
If you’re wondering which option to choose based on your specific needs, take a look at this flowchart.
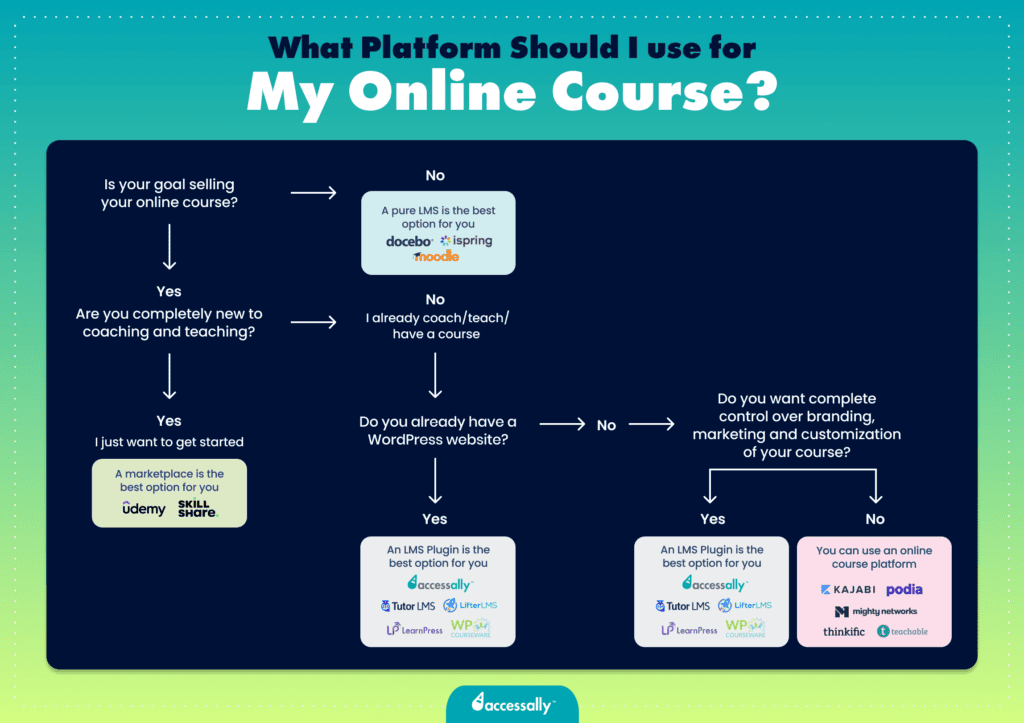

We’ll dive deeper into each of these options further in the article. But before we do that, let’s quickly break down when to choose each option:
- If you’re an educational institution and your goal isn’t to sell courses, choose an LMS platform like Moodle,
- If you’re a new course creator just dipping your toes in the world of online course sales, choose a marketplace like Udemy,
- If you’re a successful entrepreneur with an established audience willing to buy your new online course and you don’t have your own website, choose an online course platform like Kajabi,
- If you’re an established course creator and you want to host your courses on your own WordPress website, choose a WordPress LMS plugin like AccessAlly.
What Is an LMS?
An LMS is a software application designed to help institutions, companies, and educators manage, deliver, and track educational content and training programs.
🎓 Simply put, an LMS is a platform where educational institutions, universities, and big companies keep their training material for students and employees to access remotely. Some examples of pure LMS platforms are Moodle, Docebo, and Blackboard Learn.
There are two main types of learning management systems:
- Corporate LMS: Designed for companies to use as a platform for training employees, partners, or clients. It can be used, for example, as part of the onboarding process for clients or skill development training for employees.
- Academic LMS: Designed for schools and universities to complement their learning program and offer students a centralized digital platform to access study material, courses, and assessments, and even collaborate with colleagues and get feedback from professors.
The goal of an LMS platform is to host training material courses rather than sell them. So, if you’re a course creator looking to sell your courses, this isn’t the right option for you.
What Is an Online Course Platform?
Online course platforms like Kajabi or Podia are designed for entrepreneurs and companies who need a place to host their courses and want an easy way to build and sell them. These platforms often include features for designing course content, collecting payments, and interacting with students, guiding the course creation process from start to finish.
🖇️ Typically, online course platforms are used by course creators for whom selling courses is just an additional aspect of business rather than its central focus. For instance, a coach who sells online courses aside from their coaching programs might choose a platform like Kajabi because it allows them to create, manage, and sell their course easily.
While this choice might not open the floodgates for massive growth, it’s a great option for those who aren’t looking for their course to be their primary source of income. It’s also an excellent choice for those who don’t want to invest time in advanced course customization.
What Is an LMS Plugin?
LMS plugins, such as AccessAlly and LearnDash, are exactly what the name suggests: LMS WordPress plugins that allow entrepreneurs and companies to host their online courses on their WordPress websites.
Businesses for whom selling courses is the main source of income and who already have a WordPress website often go for an LMS plugin. That’s because it gives them total control over their content and full customization options.
🌿 Established course creators usually prefer to host their courses on their own websites and under their company branding, as it gives them unlimited growth possibilities. However, because they’re hosting their courses directly on their own websites, they must commit to marketing and promoting their courses on their own.
So, if online course sales are your primary focus and you already have a well-established WordPress site, an LMS plugin might be just what you’re looking for.
What Is a Course Marketplace?
Many new entrepreneurs and businesses often turn to course marketplaces when they first step into the world of online course creation.
☑️ These marketplaces are platforms where you can upload and sell your course to a broad audience without the hassle of setting up your own website. In simple words, they act as marketplaces for learning that connect course creators with students.
The appeal of marketplaces like Udemy, Skillshare, and Coursera for new course creators lies in the fact that they already have an audience full of potential learners who might be interested in the course.
These platforms will usually market your course for you and take a fee from every sale you make.
This is a great option for those who want to sell online courses on the side or dip their toes in online course sales. The drawback, though, is that platforms like Udemy and Skillshare offer minimal customization and limited growth potential.
However, if you don’t have an established audience or do not want to spend time marketing your course, these marketplaces might be a good option for you.
Summary of the differences
Before you choose the platform for your online course, consider the effort, time, and commitment you’re willing to invest in setting up and selling your courses.
Keep in mind that lower commitment means lower potential for growth. And vice versa, the more committed you are and the more effort you’re willing to put into your course sales, the higher the growth potential.
Here are your options depending on your commitment level:
- Low commitment: If you want the easiest option that doesn’t require much effort into customization and marketing, go for an online course marketplace.
- Medium commitment: If you’ve got an established audience and are ready to put a bit of time and effort into setting up and selling your course, opt for an online course platform.
- High commitment: If you’re ready to fully commit to building, marketing, and selling your online course, choose an LMS plugin.
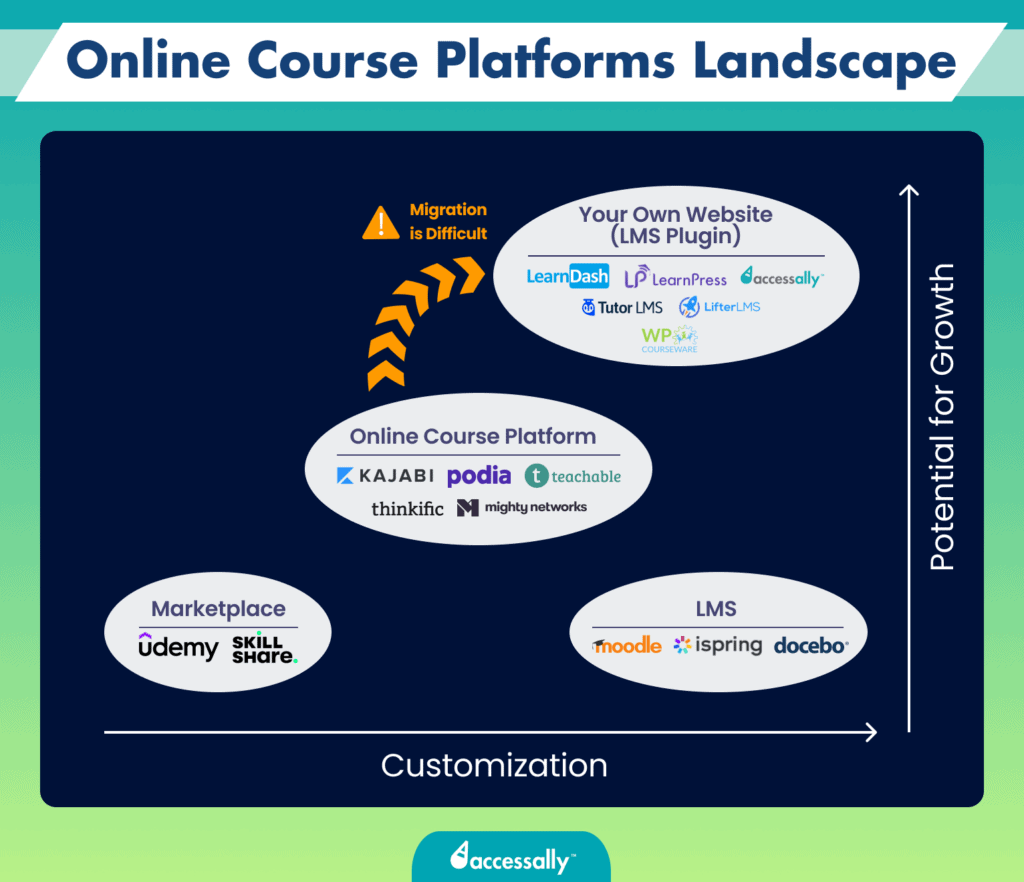
The main benefit of hosting your course on a platform like Podia or Kajabi first is that you can test your idea. That’s why most business owners begin selling their courses on online course platforms. Once their online courses start to bring recurring income, they begin thinking about taking their courses to the next level.
That’s where they choose to switch to a self-hosted option (an LMS plugin for WordPress) that allows for more customization and gives them complete control over the delivery of their course.
However, migrating their courses from one platform to another can be challenging, time-consuming, and often very frustrating. That’s why deciding on your long-term vision for your online courses can help eliminate migration issues and lost revenue down the line.
Migrating from an online course platform to a self-hosted solution is very difficult, that’s why picking the right platform from the very beginning is crucial.

LMS Plugins
Creators Who Have an Established Website They Want to Host Their Course On
Today, 43% of websites are powered by WordPress, according to a survey by W3Techs. Many businesses build their websites on WordPress because it offers high customization thanks to tons of user-friendly website builders and plugins that can further expand their site’s capabilities.
LMS plugins give WordPress sites the ability to host and sell online courses. An LMS plugin is an excellent option for those course creators who are already making recurring income from their courses and are ready to take the next step by migrating their courses onto a self-hosted platform. Also, these creators know that they’ll need full control over their branding and marketing in order to scale (which is only possible with a self-hosted solution).
Similarly, if you’re an entrepreneur or a company with a well-established audience and you want to host your first or next online course on your own website, an LMS plugin is still a great option for you, given that you have the time and resources to get it running.
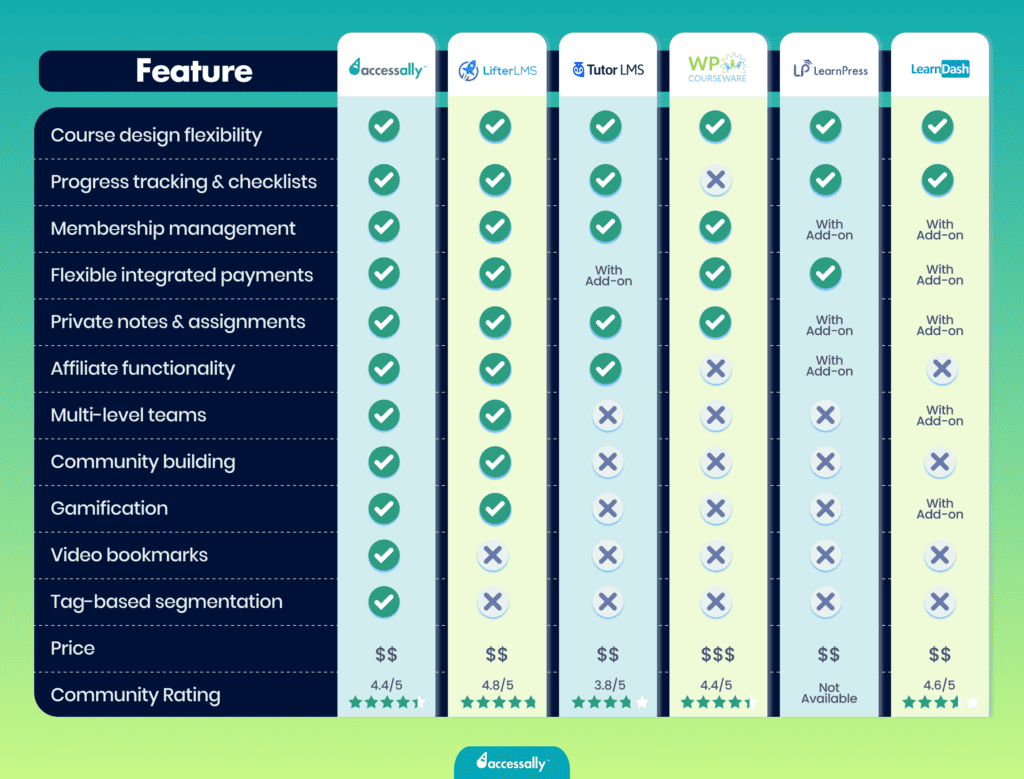
In this article, we’ll present the 3 most popular LMS plugins: AccessAlly, LearnDash, and LifterLMS. However, there are many more, as you can see in the table below:

1. AccessAlly – The most seamless solution

What Is AccessAlly?
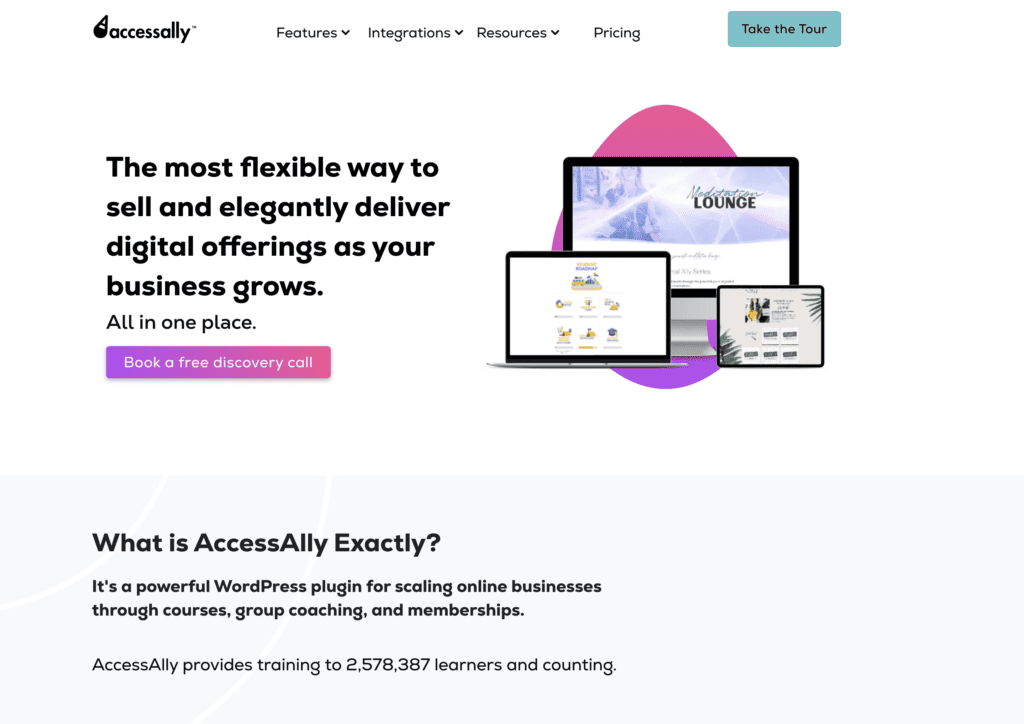
AccessAlly is the most advanced and seamless LMS plugin on the market. It’s often considered an “out of the box” version of other LMS plugins.
There are two main elements that make AccessAlly stand out from other LMS plugin solutions:
- AccessAlly doesn’t require any add-ons.
With other LMS plugins, you often have to stack endless add-ons to get the functionalities you need.
This can become a problem because add-ons are typically made by third parties and can often cause tech conflicts, breaks in functionality, and errors on the site. And as a course creator, you know how important it is for your course website to work seamlessly at all times.
This also means that if an issue comes up with an add-on, you’d have to contact the support of the add-on developer. This can lead to a lot of back-and-forth finger-pointing. The third-party add-on developer support points you back to the LMS plugin, and the LMS plugin support points you back to the add-on creator.
Because AccessAlly doesn’t require any add-ons to achieve the full functionality of the plugin, there are no tech headlines and no back-and-forth finger-pointing.
- AccessAlly’s customer support is highly responsive.
If customer support is not top of mind for you when choosing your online course solution, it definitely should be. As long as everything goes well, it’ll hardly be needed. But if your site suddenly experiences an issue that stops it from functioning, you need to be able to rely on efficient and responsive customer support that can fix it fast.
With other LMS plugins, it may take up to five days to solve an issue on your site. But with AccessAlly, it only takes hours.
Overall, what makes AccessAlly different from other LMS plugins is how seamless the platform is. Since it doesn’t require add-ons, the probability of tech issues caused by duct-taping multiple add-ons on top of each other is pretty much non-existent.
Who Should Use It
AccessAlly is best for companies who want to scale their online course without tech headaches and stacking endless add-ons.
Pros & Cons
- Full control over course delivery
- Advanced customization options
- Seamless integration with WordPress
- All-in-one platform for course creation
- Support memberships and member directories
- Scalable with no per-student cost
- Community engagement features (CommunityAlly)
- No add-ons required
- Top-notch customer support
- Steep learning curve for beginners
- Initial setup takes time
Price
AccessAlly offers three subscription plans, starting at $82 USD per month (billed annually).
Reviews
Capterra Rating: 4.5/5
G2 Rating: 4.8/5
2. LearnDash – The king of duct-taping


What Is LearnDash?
Although LearnDash is a popular choice for course creators looking to host their online courses on their own WordPress website, it is quite outdated in its functionalities and hardly user-friendly.
The main issue with LearnDash is that the platform requires you to stack multiple add-ons before you can fully experience the benefits that an LMS plugin is supposed to offer. Because add-ons are usually developed by third parties, when you stack a lot of them on top of each other, it can lead to technical “short-circuits” that can hinder the functionality of your site or cause it to crash entirely.
So, using LearnDash can feel like duct-taping things together and can quickly become a nightmare to deal with.
Who Should Use It
We suggest steering clear of LearnDash since it’s somewhat outdated, and there are much better alternatives available in the market. AccessAlly is often seen as a more modern and user-friendly version of LearnDash, providing a more seamless and ready-to-use experience.
Pros & Cons
- User-friendly and intuitive interface
- Easy to use for beginners
- Lightweight and robust LMS plugin for WordPress
- A seamless end-user experience in online learning
- Drag-and-drop course builder
- Interactive features like advanced quizzes and assignment management
- Some features are very complex
- The feature suite can be overwhelming for small creators
- Must install additional plugins for more customization
Price
LearnDash offers subscription plans starting at $199 USD per year for one site.
Reviews
Capterra Rating: 4.6/5
G2 Rating: 4.3/5
3. LifterLMS – A weak version of AccessAlly

What Is LifterLMS?
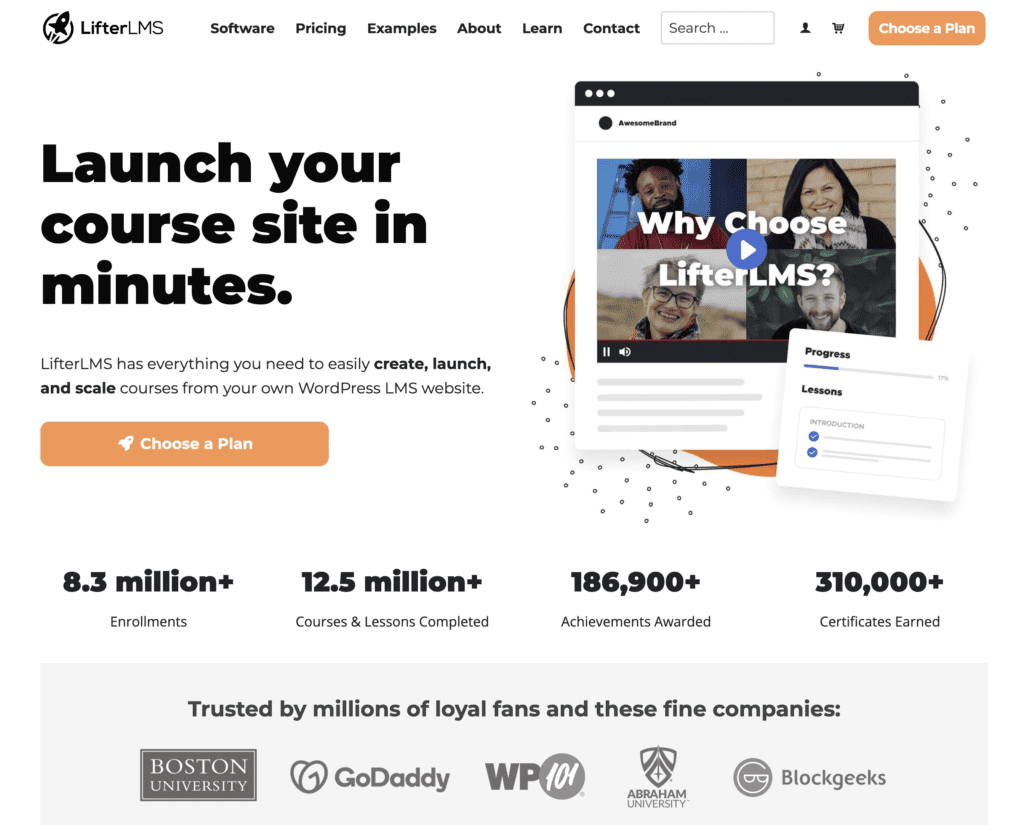
LifterLMS is a much better choice than LearnDash, mainly because it requires fewer add-ons. However, you’ll still need to stack some add-ons for crucial marketing functions, such as CRM integration and payment options, just to name a few.
So even though LifterLMS is a better option, it’s still not the greatest. There’s still some duck-taping involved and the platform isn’t as seamless as you’d expect. The necessity for these add-ons introduces the potential for errors. Because the more add-ons you have to stack, the more potential for tech issues, site crashes, and compatibility problems.
So, using LifterLMS is like building a tower with too many blocks. The higher it becomes, the shakier it gets.
Who Should Use It
Although LifterLMS can be a good option for course creators who want to scale their online course by hosting it on their own website, it’s still a much less powerful version of AccessAlly.
Pros & Cons
- The core LMS plugin is free
- It works well with any WordPress theme
- It comes with SkyPilot – a WordPress theme designed for e-learning experiences
- Transparent subscription-based pricing without hidden fees
- 30-day money-back guarantee
- Core differences between subscription plans may be confusing
- It may be complex to use for non-techie creators
- No community engagement features
- Most integrations are only available on the more expensive plans
Price
LifterLMS plans start at $199 USD per year, but there’s a freemium plan.
Reviews
Capterra Rating: 4.8/5
G2 Rating: 4.9/5
Standalone Platforms
Course Creators With an Established Audience
Standalone online course platforms are the best solution for those course creators for whom online courses aren’t the primary income source.
For instance, if you’re a coach with an established audience and want to expand your business by offering people a chance to work with you at a lower price point, creating an online course or a membership is a great solution.
In that case, you can turn to an online course platform like Kajabi or Podia to create, host, and sell your course. Similarly, if you’re a company that wants to provide self-paced online courses as part of its offerings, you might want to host those courses on a separate platform like Kajabi.
These platforms provide course creators a place to host their courses through a monthly or yearly subscription. Setting up these platforms is much more straightforward than creating your own website. However, they often come with limited customization and branding options.
Here are the 4 most popular online course platforms.
1. Kajabi


What Is Kajabi?
Kajabi is an all-in-one solution that lets course creators manage their entire online business, including marketing, from one central platform. It’s like Podia but on a whole another level – think Podia on steroids. However, Kajabi also comes with a higher price tag than Podia mainly because it includes marketing tools that Podia doesn’t offer.
Kajabi is as high as you can go in terms of customization before switching to a self-hosted platform.
However, some course creators regret making Kajabi their initial choice when it’s time to scale. Since the platform isn’t scalable, the only other choice is to host their course on their own website with an LMS plugin. And that would be a great option if not for the nightmare it becomes to migrate their course from Kajabi to a self-hosted platform.
Who Should Use It
Kajabi is a great option for those who are looking for as many features and as much customization as possible for their online course without the hassle and costs of self-hosting.
However, Kajabi is only good for those who don’t plan on switching to a self-hosted solution in the future, as migration from Kajabi to a self-hosted platform can be extremely challenging.
Pros & Cons
- Features to monetize courses, coaching, memberships, and even podcasts
- Subscription-based pricing model with zero revenue share fees
- Integrations with 12 essential tools like Zapier, Stripe, and ConvertKit
- Access to Kajabi’s free webinars to help creators build successful businesses
- Live 24/7 support and access to Creator Community and Kajabi University
- May be expensive for new and small course creators
- Can be complex to set up
- Steep learning curve for beginners
- Too many features can be overwhelming
- Limited customization options
Price
Kajabi’s pricing plans start at $119 USD per month, billed annually.
Reviews
Capterra Rating: 4.4
G2 Rating: 4.4/5
2. Podia

What Is Podia?
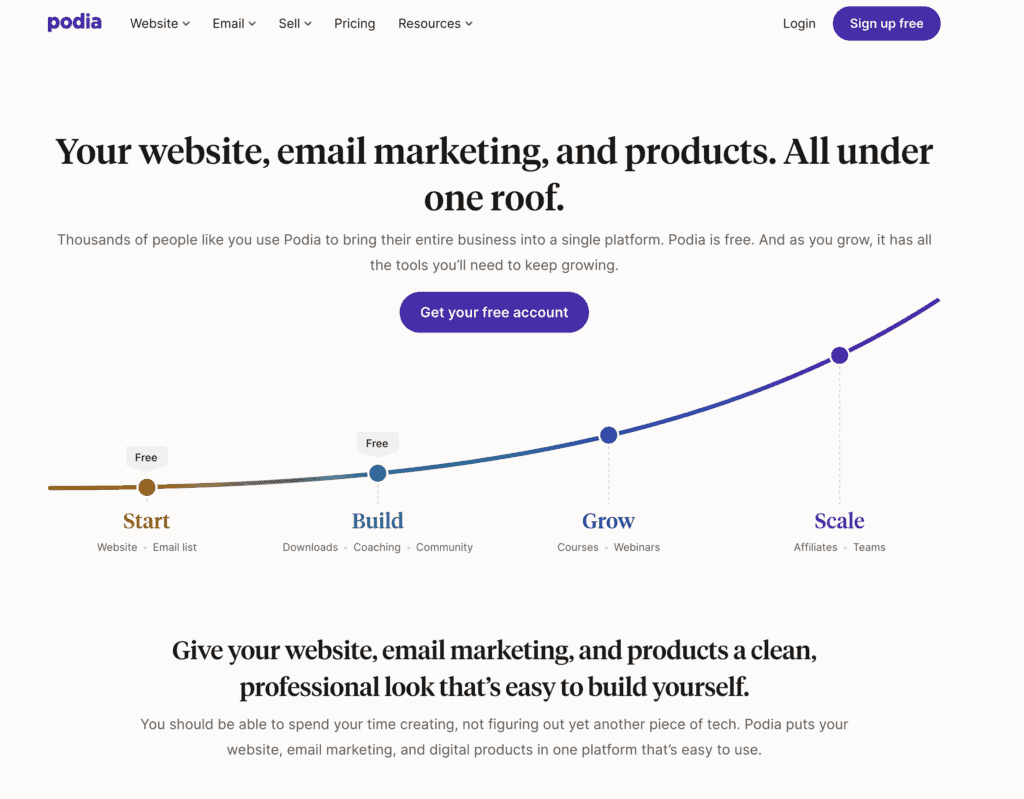
Podia is a lighter, less expensive version of Kajabi, minus the marketing features. Although it offers all the functionalities of an online course platform, it’s only slightly better than a course marketplace due to its very limited customization options and lack of marketing features.
Who Should Use It
Podia is a great choice for creators on a budget who are new to the world of online courses. It’s perfect for those who want to explore the benefits of a platform without breaking the bank. So, if you just want to test the waters of online course creation and aren’t focused on marketing, Podia can be a great solution for you.
Pros & Cons
- An all-in-one platform
- User-friendly and intuitive interface
- Offers a free plan
- Possibility to hire a Podia Pro to help you set up your business on Podia
- Easily scalable with higher pricing plans and add-ons
- Affordable pricing for new and small course creators
- Limited customization options
- Limited integration options
- The free plan comes with an 8% transaction fee for every sale
Price
Podia’s subscription plans start at $33 USD per month if billed yearly. Podia also offers a free forever plan.
Reviews
Capterra Rating: 4.5/5
G2 Rating: 4.6/5
3. Teachable

What Is Teachable?
Teachable and Podia are very similar in terms of course-building, sales, and marketing functionalities.
However, Teachable is a great alternative to Podia for those who are looking to create interactive courses with learning tools, such as graded quizzes, certificates, and content locking. On the other hand, Podia is better for those looking to create a membership site.
Who Should Use It
Like Podia, Teachable is best for new and small course creators looking for a budget-friendly and straightforward solution to launch their online courses without too many marketing options. Both platforms are a good solution for those who are just testing the waters of online course creation.
Pros & Cons
- User-friendly interface that makes it easy to set up your courses, coaching programs, and digital products
- Affordable pricing for new and small course creators
- Offers a free forever plan
- Easily scalable when your business grows
- Limited customization options
- High currency conversion fees for any currency other than USD
- 10% transaction fee for every sale on the free plan
- Many user complaints about inefficient customer support
Price
Teachable’s pricing plans start at $39 USD per month if billed yearly. Teachable also offers a free plan.
Reviews
Capterra Rating: 4.3/5
G2 Rating: 4.0/5
4. Thinkific
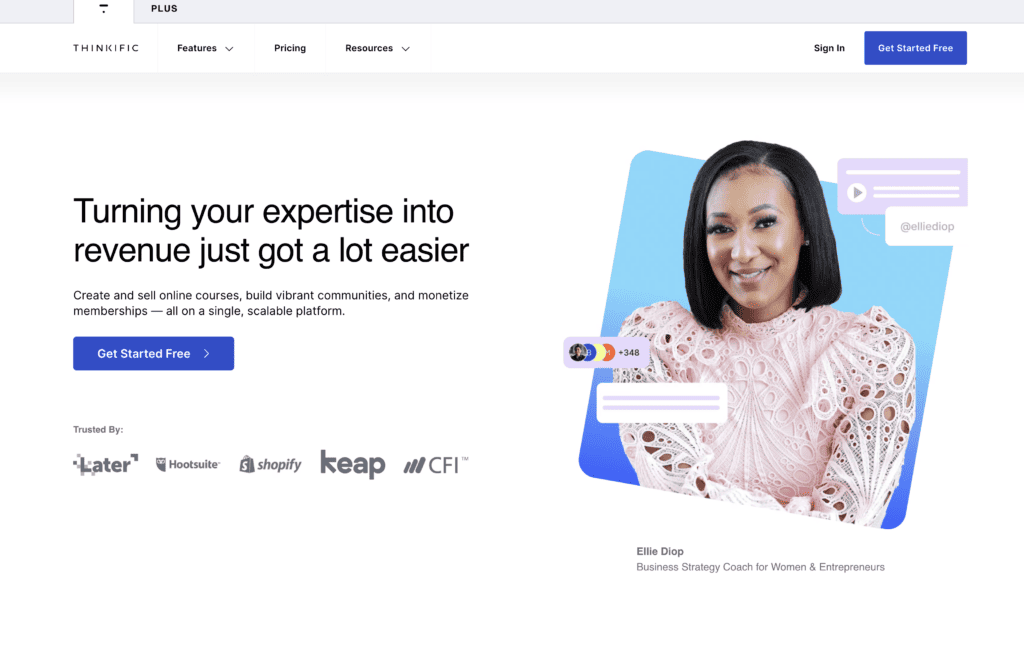

What Is Thinkific?
Thinkific outshines Podia in terms of course creation functionalities. Although very similar to Podia, Thinkific provides a broader range of features, including quizzes, surveys, and interactive presentations, giving users a more comprehensive toolkit for building engaging and interactive courses.
Who Should Use It
Just like Podia and Teachable, Thinkific is best for budget-friendly course creators who are new to the world of online courses and want to enjoy the benefits of a platform without breaking the bank. It’s best for creators who aren’t looking for marketing options at this stage.
Pros & Cons
- Free 30-day trial
- Free access to Thinkific’s Accelerator Program on any paid plan
- Community engagement features
- Option to build a mobile app
- Integrates the major tools you might need to run your business
- Limited design customization
- Can be expensive for new and small creators
- More costly than its direct competitors
- Outdated interface
- Limited capabilities unless you buy additional plugins
Price
Thinkific’s subscription plans start at $74 USD per month if billed yearly.
Reviews
Capterra Rating: 4.6/5
G2 Rating: 4.7/5
Course Marketplaces
For New Course Creators With Small Budgets
Course marketplaces are a great option for small course creators who are new to the world of online course creation. These platforms are a great place to test the waters and get some reviews and feedback from students before launching your course to your own audience.
Marketplaces are also an excellent solution for those course creators who don’t have an audience to sell their courses to and want to tap into the large base of online course buyers these platforms have amassed.
Plus, after you set up your course on a marketplace, you don’t have to put time and effort into marketing it because the platform will do that for you. However, you cannot control how your courses are promoted, and your earnings will be limited.
Here are the 3 most popular online course marketplaces.
1. Udemy
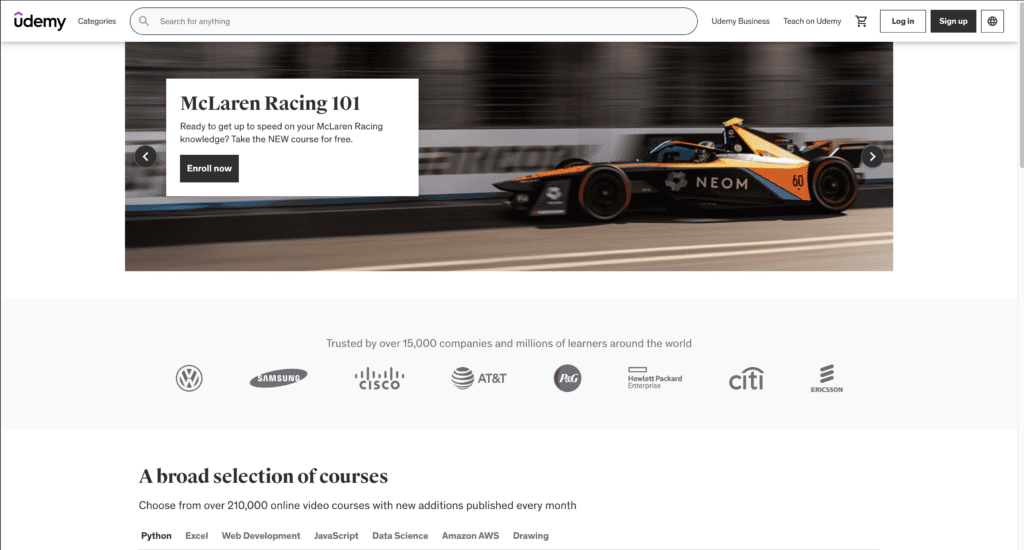

What Is Udemy?
Udemy is the most popular course marketplace that allows anyone to create and sell an online course. As of September 2023, Udemy boasts over 67 million learners, 75,000 instructors, and 210,000 online courses in over 75 languages.
The platform offers new course creators the possibility to sell their courses with minimal effort. The idea is simple: Udemy will promote your course to its enormous audience and take a fee from every sale you make.
Who Should Use It
Udemy is best for small course creators who want to test their course idea or make passive income from their online course without putting too much effort into marketing.
Pros & Cons
- No cost to join the platform as an instructor
- Access to an extensive base of online course buyers
- Easy to set up your course
- Option to provide a completion certificate for every student
- Access to the Teaching Center, instructor community, and a very responsive support team
- Instructors only get 37% from every course sale they make on the platform
- You have no control over how your course is promoted
Price
There is no fee to join Udemy as an instructor. However, the platform will take a fee out of every course sale you make. The current instructor revenue share on Udemy is 37%.
Reviews
Capterra Rating: 4.6/5
G2 Rating: 4.5/5
2. Coursera
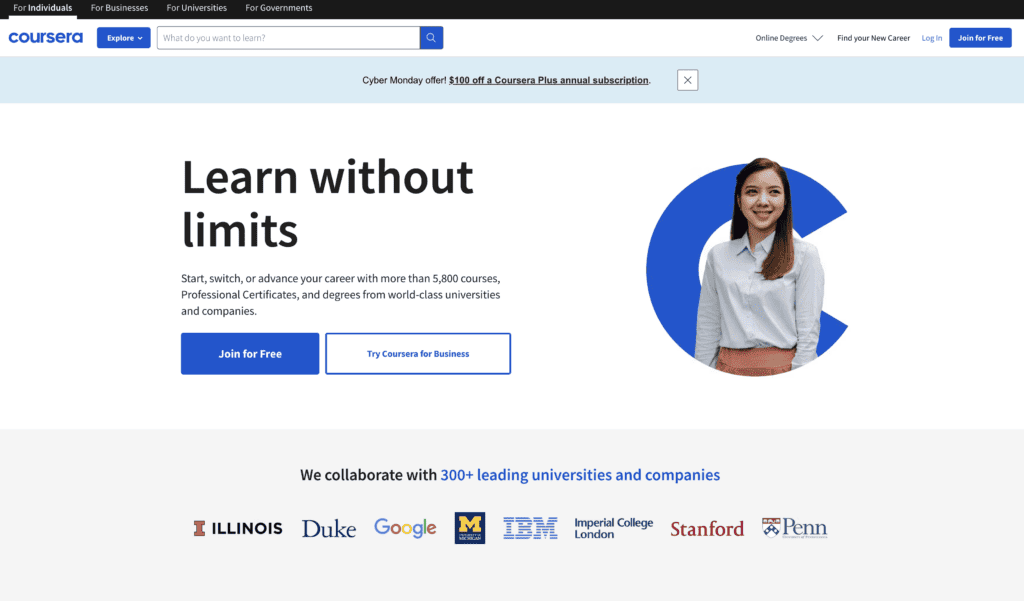

What Is Coursera?
Coursera is an online learning platform that offers a wide range of courses, specializations, and degrees from top universities and institutions worldwide. Unlike Udemy and Skillshare, not everyone can put up a course on Coursera.
The platform only accepts courses created by or in collaboration with a university. So, unless your course has been developed by or with a recognized educational institution, you won’t be able to sell it on Coursera.
Who Should Use It
Coursera is made for individuals and businesses who want to access thousands of courses from renowned universities around the world. Coursera learners can access high-quality educational content in various subjects, including technology, business, health, and more.
Pros & Cons
- An extensive catalog of high-quality courses and degrees created by top universities
- Coursera has built a strong reputation as a course provider
- You can’t sell a course on Coursera unless it has been created in collaboration with a university
Price
Coursera offers plans that enable businesses and educational institutions to give their students or employees access to thousands of skill-building courses from top universities. They don’t disclose the pricing on their website. Contact them to get a quote.
Reviews
Capterra Rating: 4.5/5
G2 Rating: 4.5/5
3. Skillshare


What Is Skillshare?
Skillshare is another popular online learning platform that offers thousands of video courses on topics ranging from graphic design and writing to marketing, cooking, singing, and more. Course creators can upload their online courses to Skillshare and access its large community of learners.
The platform operates on a subscription-based model where users pay a monthly or yearly fee to access the entire course catalog.
Who Should Use It
Anyone can sell courses on Skillshare, but the platform best supports topics in the arts, design, freelance, entrepreneurship, lifestyle, and personal development categories.
The platform claims that their top instructors earn over $100,000 per year. All you have to do to become a teacher on Skillshare is to fill out an application form, get approved, and create your course.
Pros & Cons
- No fee to join as an instructor
- Easy application and onboarding process
- User-friendly platform that makes setting up your courses very intuitive
- High earning potential
- Access to the Teacher Help Center
- No control over your earnings. The platform will calculate your monthly course earnings based on factors like minutes watched and student engagement
- Certain course topics aren’t allowed (such as spirituality, mathematics, pet care, and fitness)
- Periodic limits on new class categories
Price
There is no fee to join Skillshare as a teacher.
Reviews
Capterra Rating: 4.7/5
G2 Rating: 3.4/5


